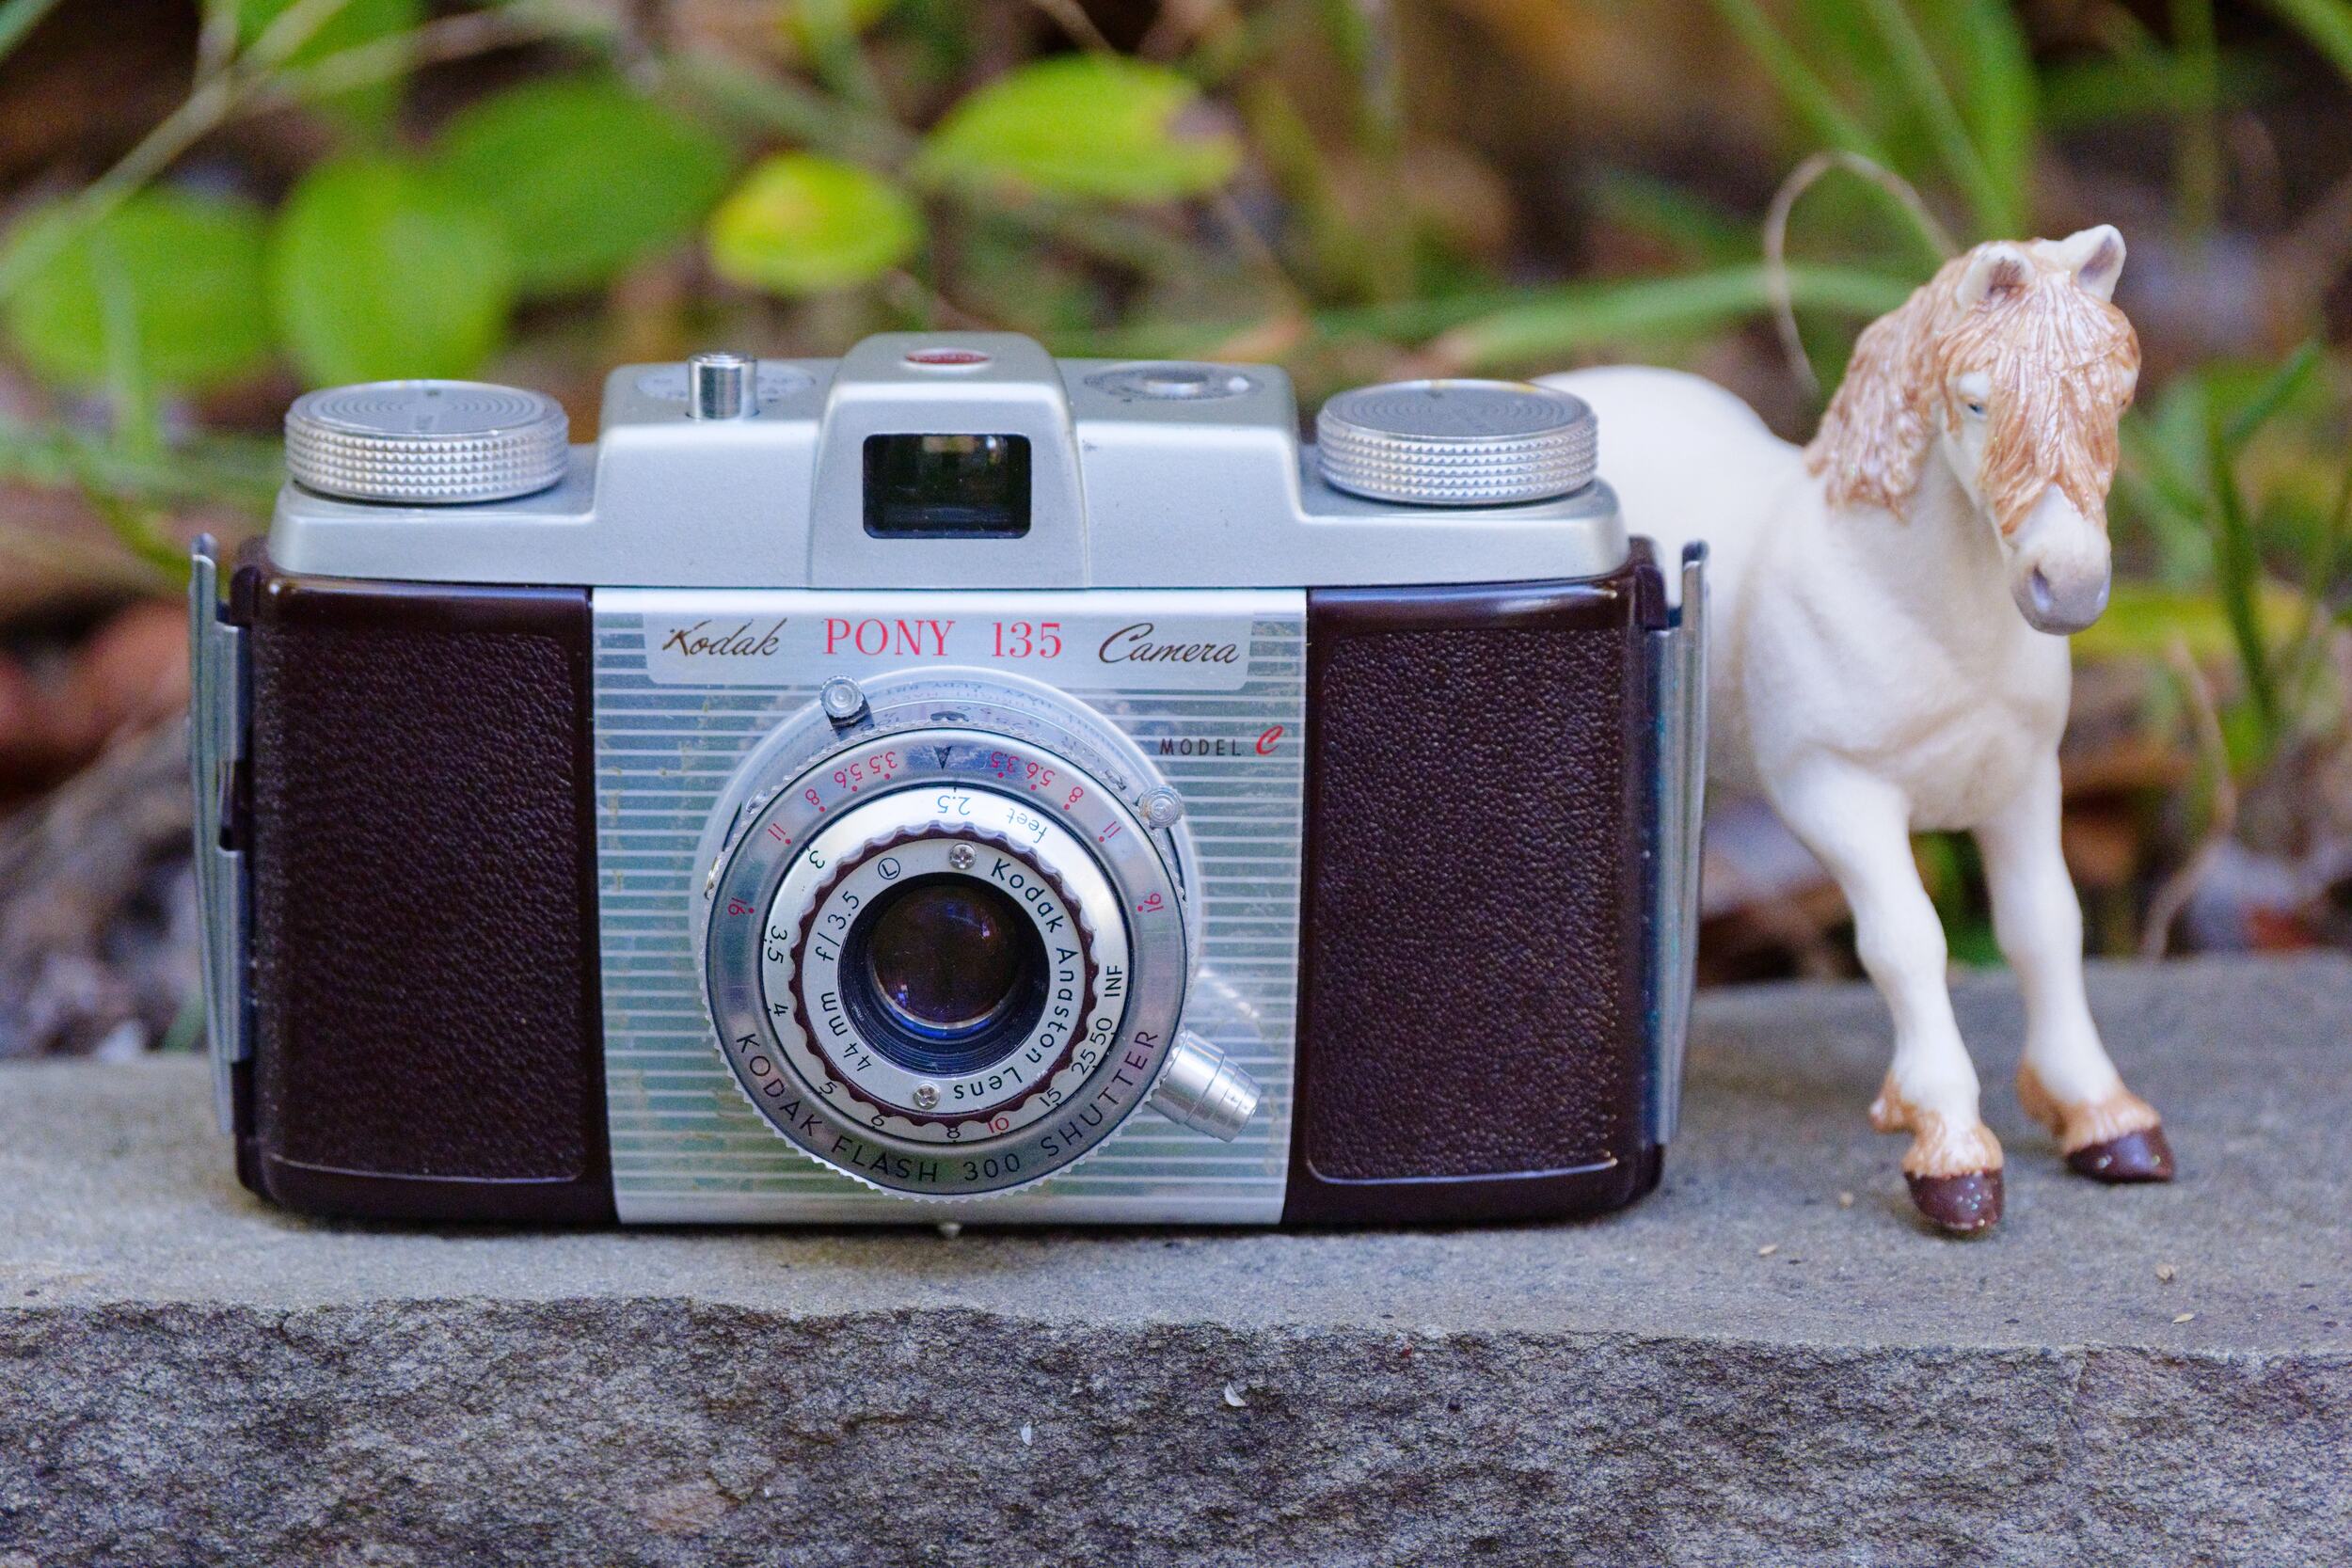
The Kodak Pony 135 Model C is the best in a series of basic, no-frills, good-enough 35mm viewfinder cameras from the 1950s and early 60s. It is solidly made of Bakelite plastic and aluminum. Nothing about it is premium or high-spec, yet it’s handsome, a pleasure to hold, and easy to use with fully manual controls. It has a very capable lens that can deliver rich, contrasty, sharp images with a touch of nostalgic character. A photo from a Kodak Pony 135 Model C will certainly stand out as special among images from a modern digital camera or smartphone.
Series Overview
The Pony 135 series is the 35mm successor to an earlier Kodak Pony 828 camera for a slightly different 828 film. The first few models are pretty similar to each other; the series concluded with a redesigned upscale/downscale pair no longer labeled 135, but included here anyway as I feel they are logically part of the series.
- Pony 135 (1950) has a black Bakelite body with a collapsible 51mm f/4.5 coated Anaston triplet lens in a Kodak Flash 200 shutter with speeds from 8th-200th and B.
- Pony 135 Model B seems essentially identical, but marked with Model B.
- Pony 135 Model C is a modest but meaningful upgrade with a faster and wider non-collapsible 44/3.5 lens, and faster shutter 25th-300th+B. It has a reddish brown Bakelite body.
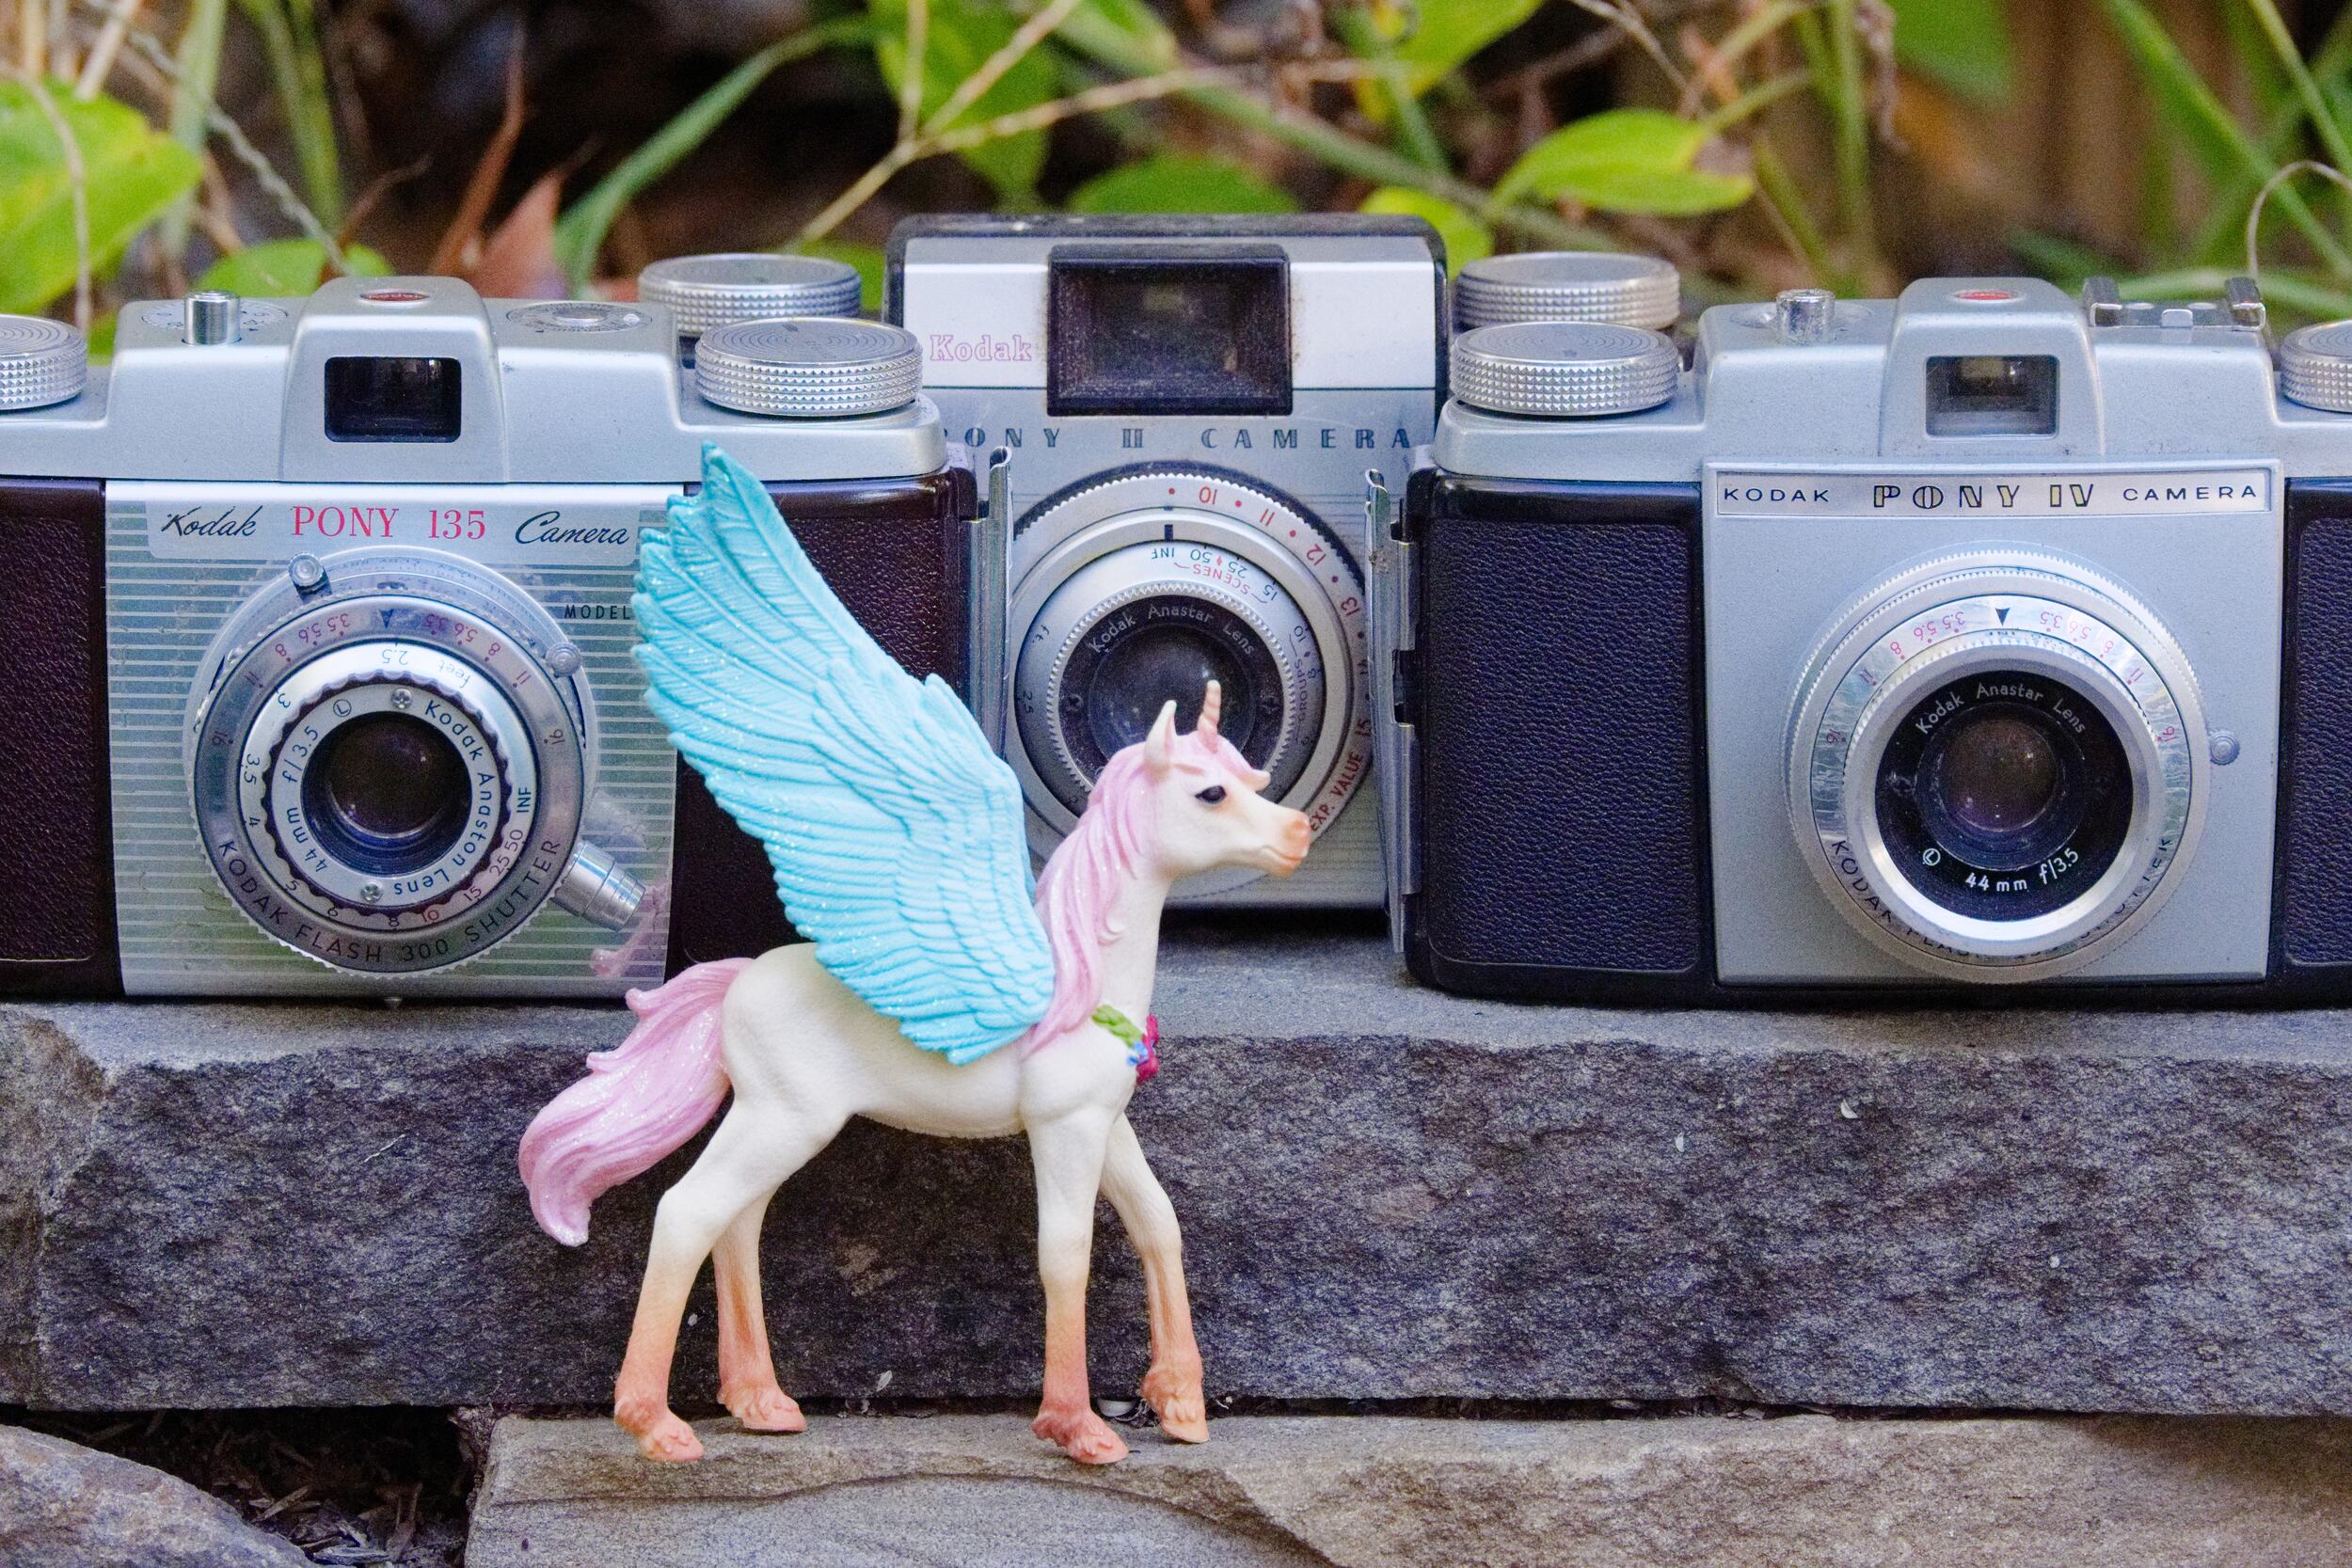
- Pony II and IV (1957-62) refreshed the styling, upgraded the lens to a premium four-element Tessar-style Anastar, and added or simplified/removed some features (i.e. added an accessory shoe). The II downgraded the shutter to single-speed, with an f/3.9 lens; it has EV values on the aperture scale instead of f-stop markings. The IV has a better shutter 30th-250th, and thoriated f/3.5 lens.
In case it’s not clear from the abbreviated list above, the first few models have manually-cocked shutters, with a lever on the side of the shutter. The shutter release button is on top of the camera body. All models also have a tripod socket, cable release socket, and the first few have a PC flash sync socket (which is almost always missing its special protective cap), but no shoe for accessories such as flashes. The serial number is on the bottom plate beneath the lens. There is a depth-of-field indicator scale on the lens. Here are a few photos of some of the Pony 135 “family” as I think of it.
I have read conflicting reports of thoriated glass, which is slightly radioactive. Some sources say all models have thoriated glass in their lenses, but according to my dosimeter, only the Pony IV has thoriated glass.
I think the best of these cameras is the Model C. It has the best build and ergonomics, and the brighter, wider-angle lens makes it easier to set an estimated focus distance, because it has greater depth of field. That makes it significantly more flexible and versatile. This review will focus mainly on the Model C; I may review the Pony IV at another time, but despite its more advanced lens, I think it’s largely a downgrade from the Model C in terms of build, ergonomics, and features.
Image Quality
The Pony 135 Model C has a triplet lens, one of the most important lens designs ever because they’re more-or-less the simplest optical design that works well. A triplet offers good correction of the major aberrations, yet has only three elements and six glass-to-air surfaces, so it transmits light well with good color. More complex lens designs can be even better than triplets, of course, but if you ask me where the point of diminishing returns is, I say it’s a triplet. Unlike those more complex lenses, in my experience, triplets don’t ruin photos with garish fringing, unpredictable flare, or unsightly rendering. Triplets just deliver—they make everything look good.
There’s little I can say about the Pony’s lens that isn’t broadly true of any good triplet. The triplet had long since been essentially perfected, and Kodak’s were first-rate. Images made with the Pony will have a rich, gently nostalgic character, with an appealing balance of contrast and resolution that draws your eye with sharpness and detail in the center and midframe, but never unwelcome harshness. At wider apertures, the character is more pronounced, and the Pony is capable of strong subject isolation and can be used for portraits or moody scenics.
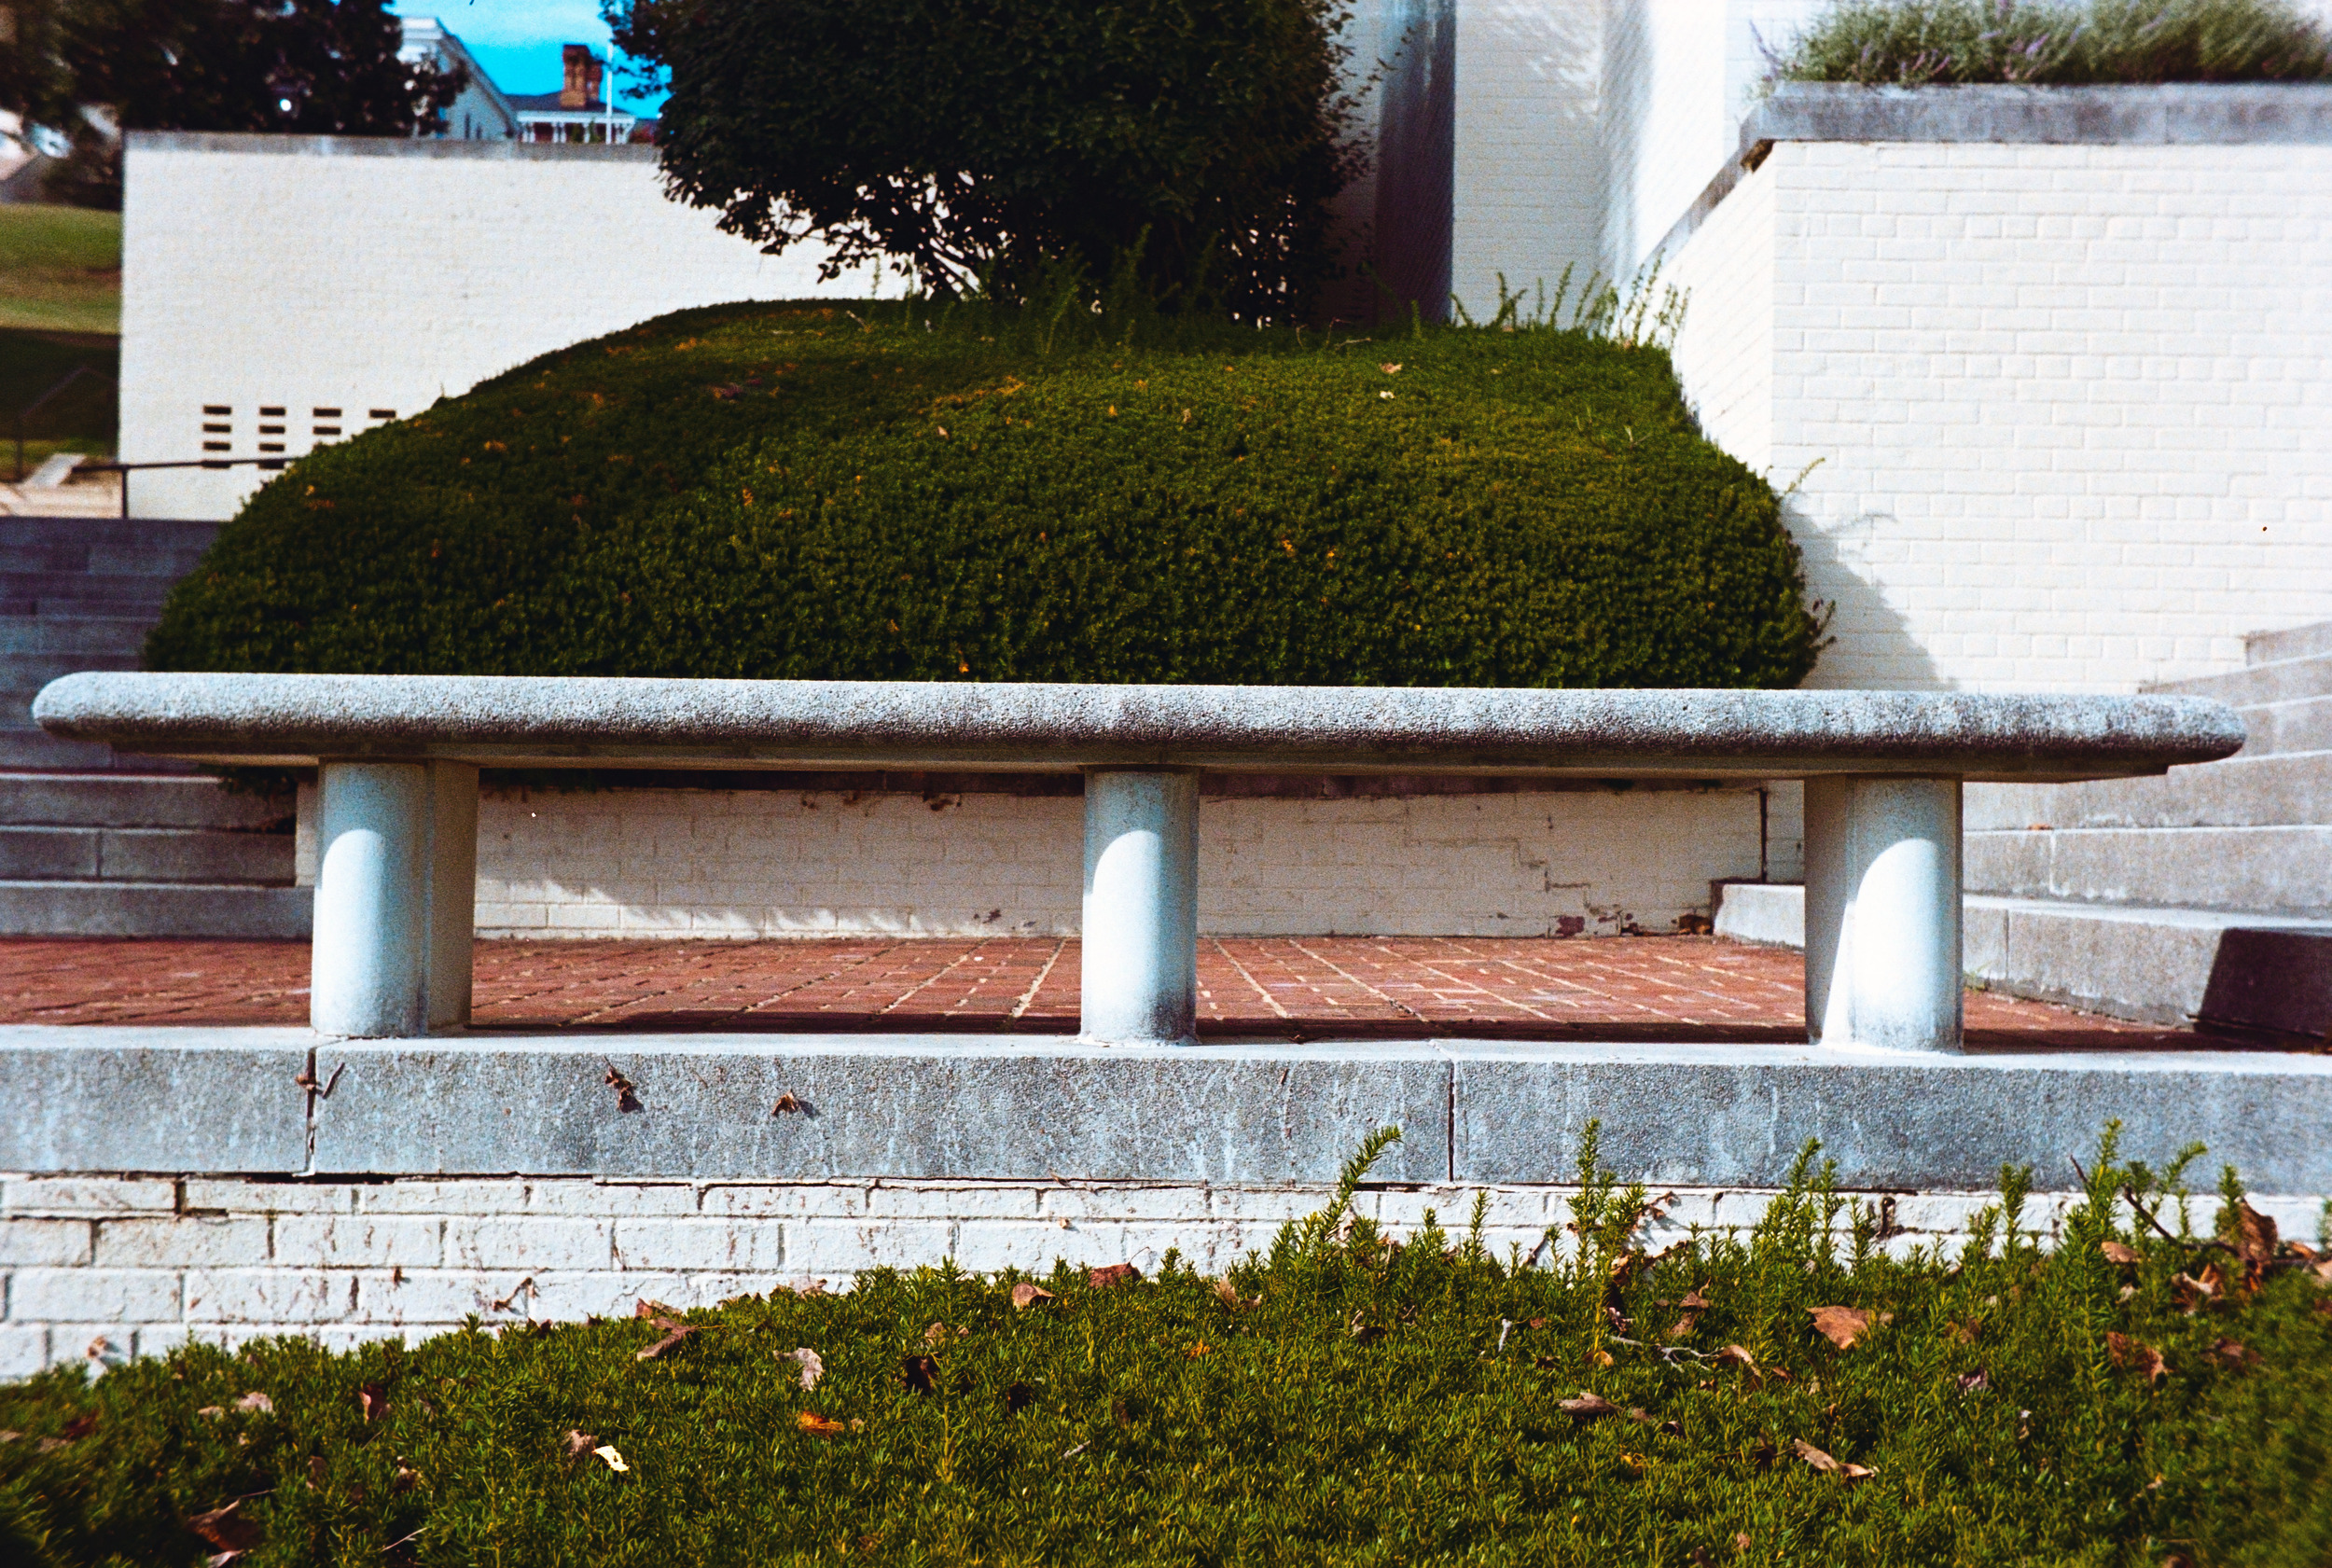
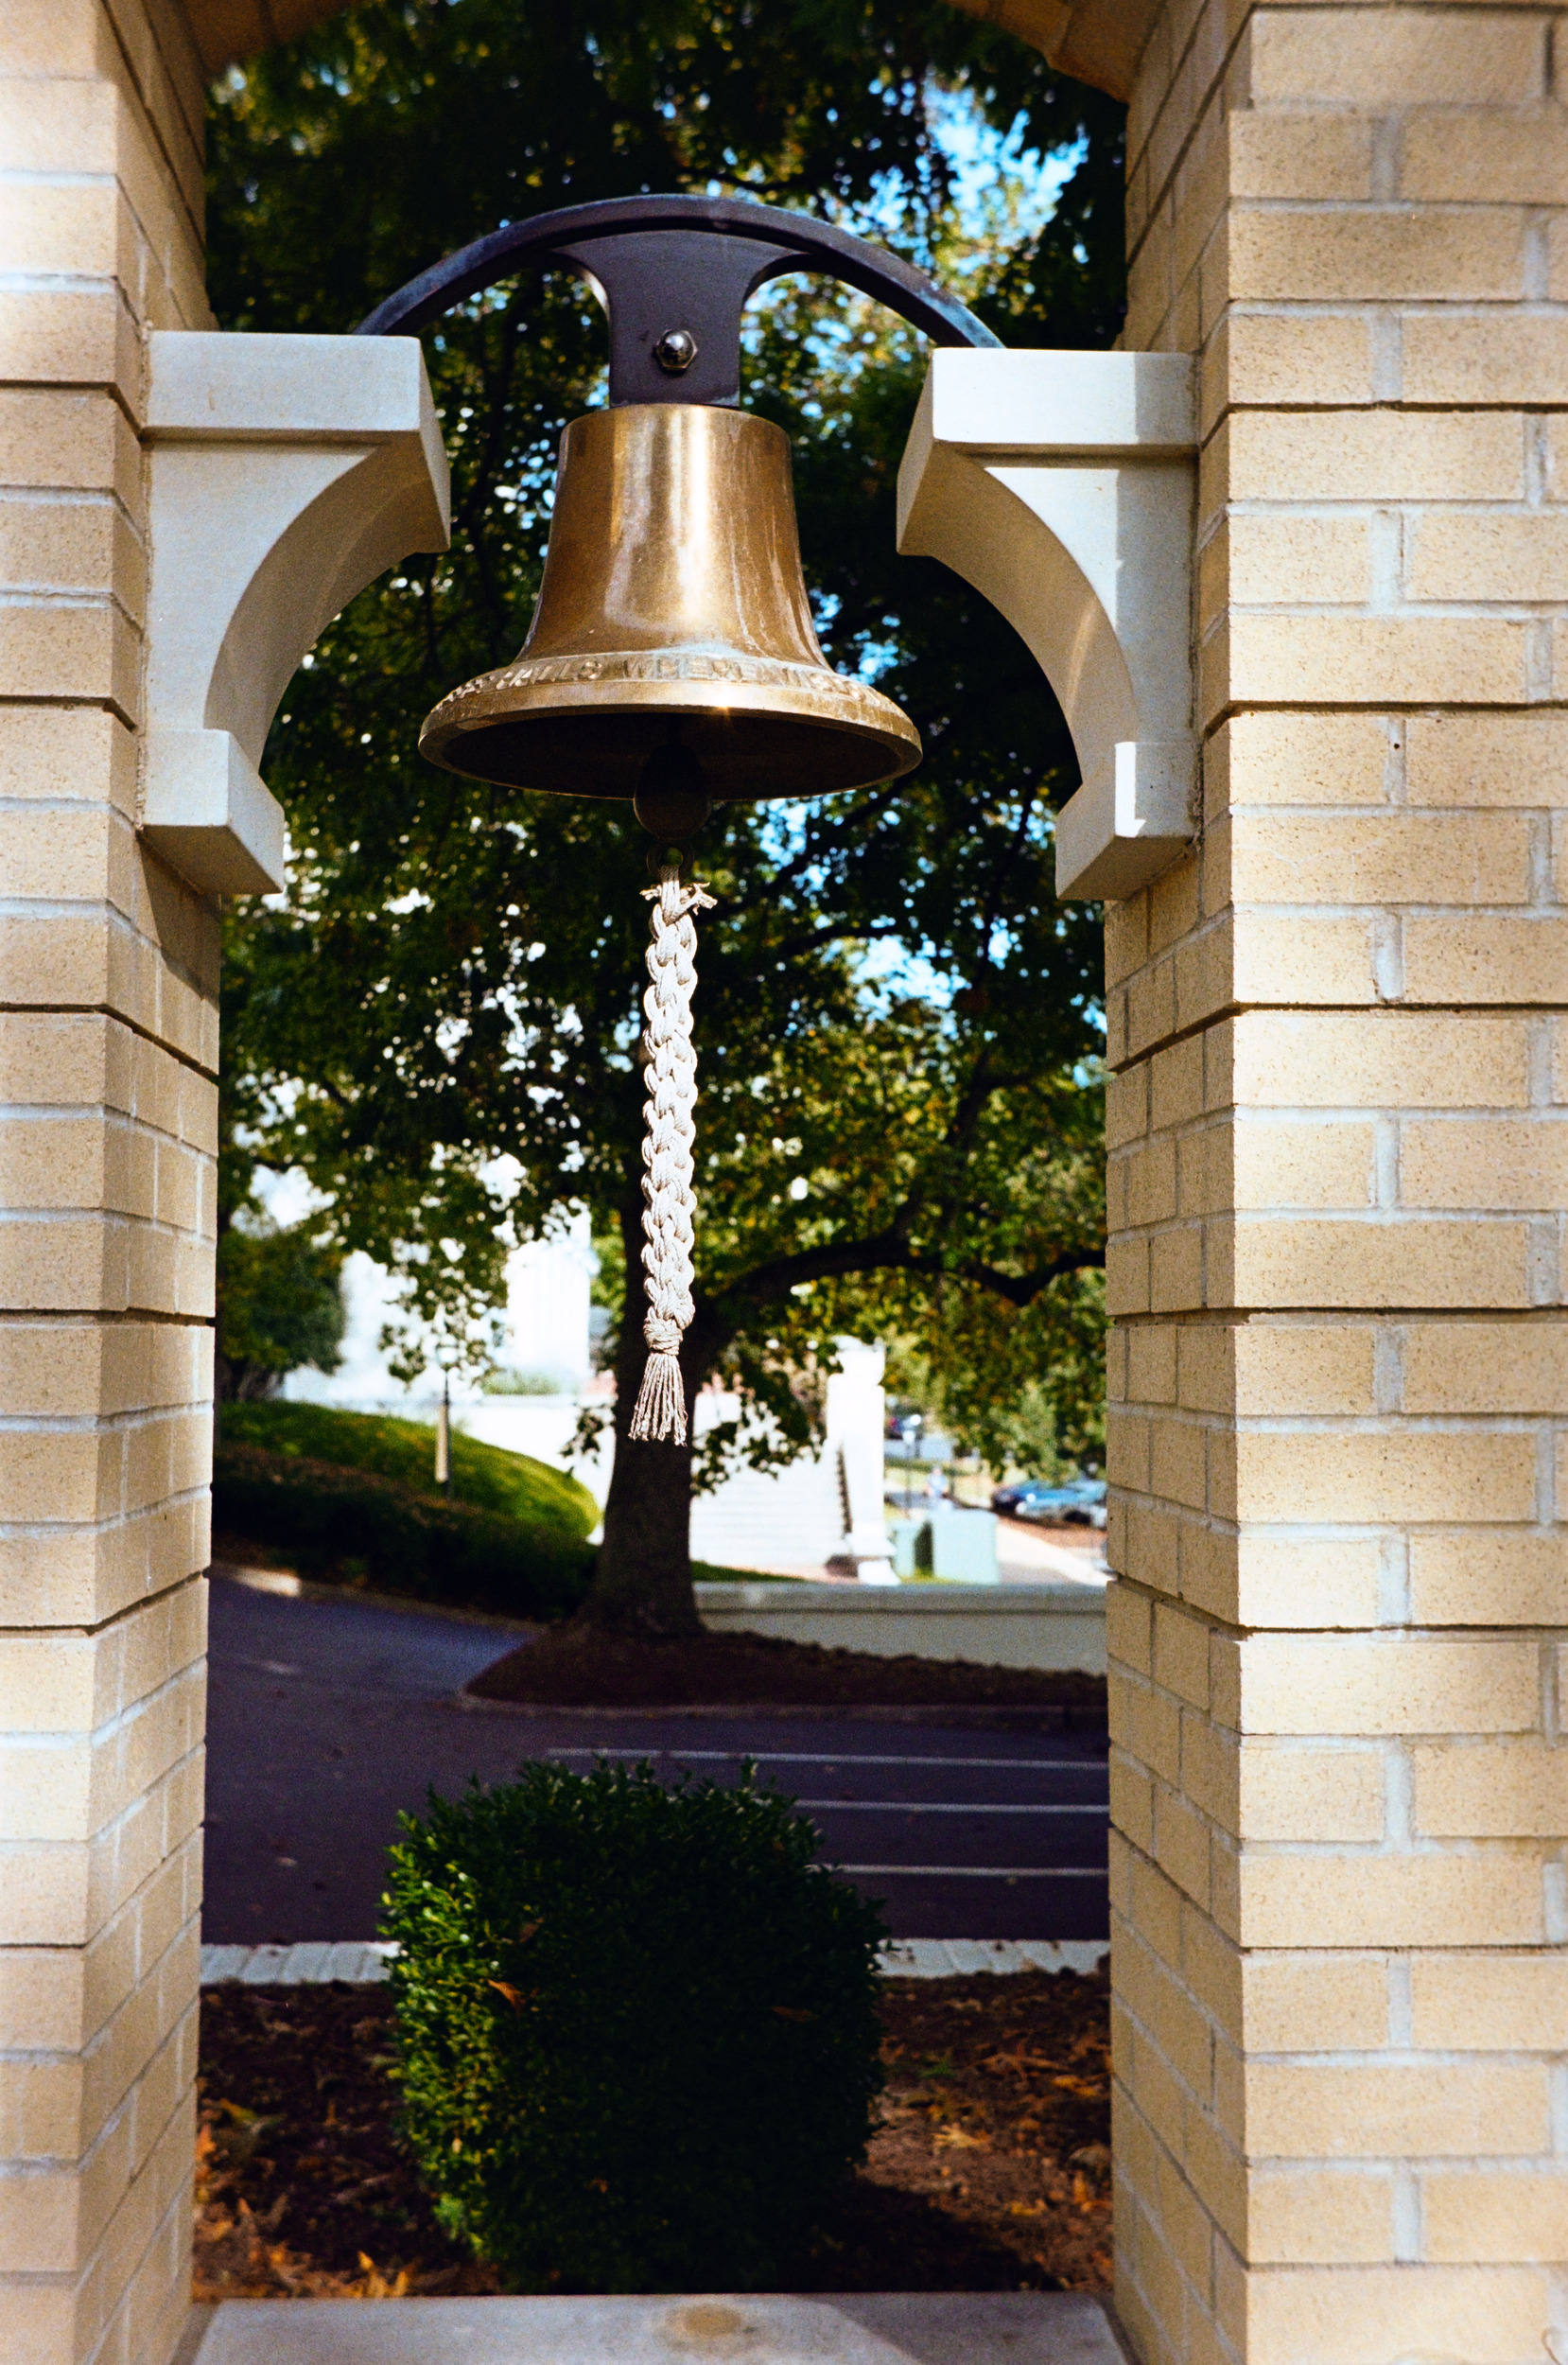
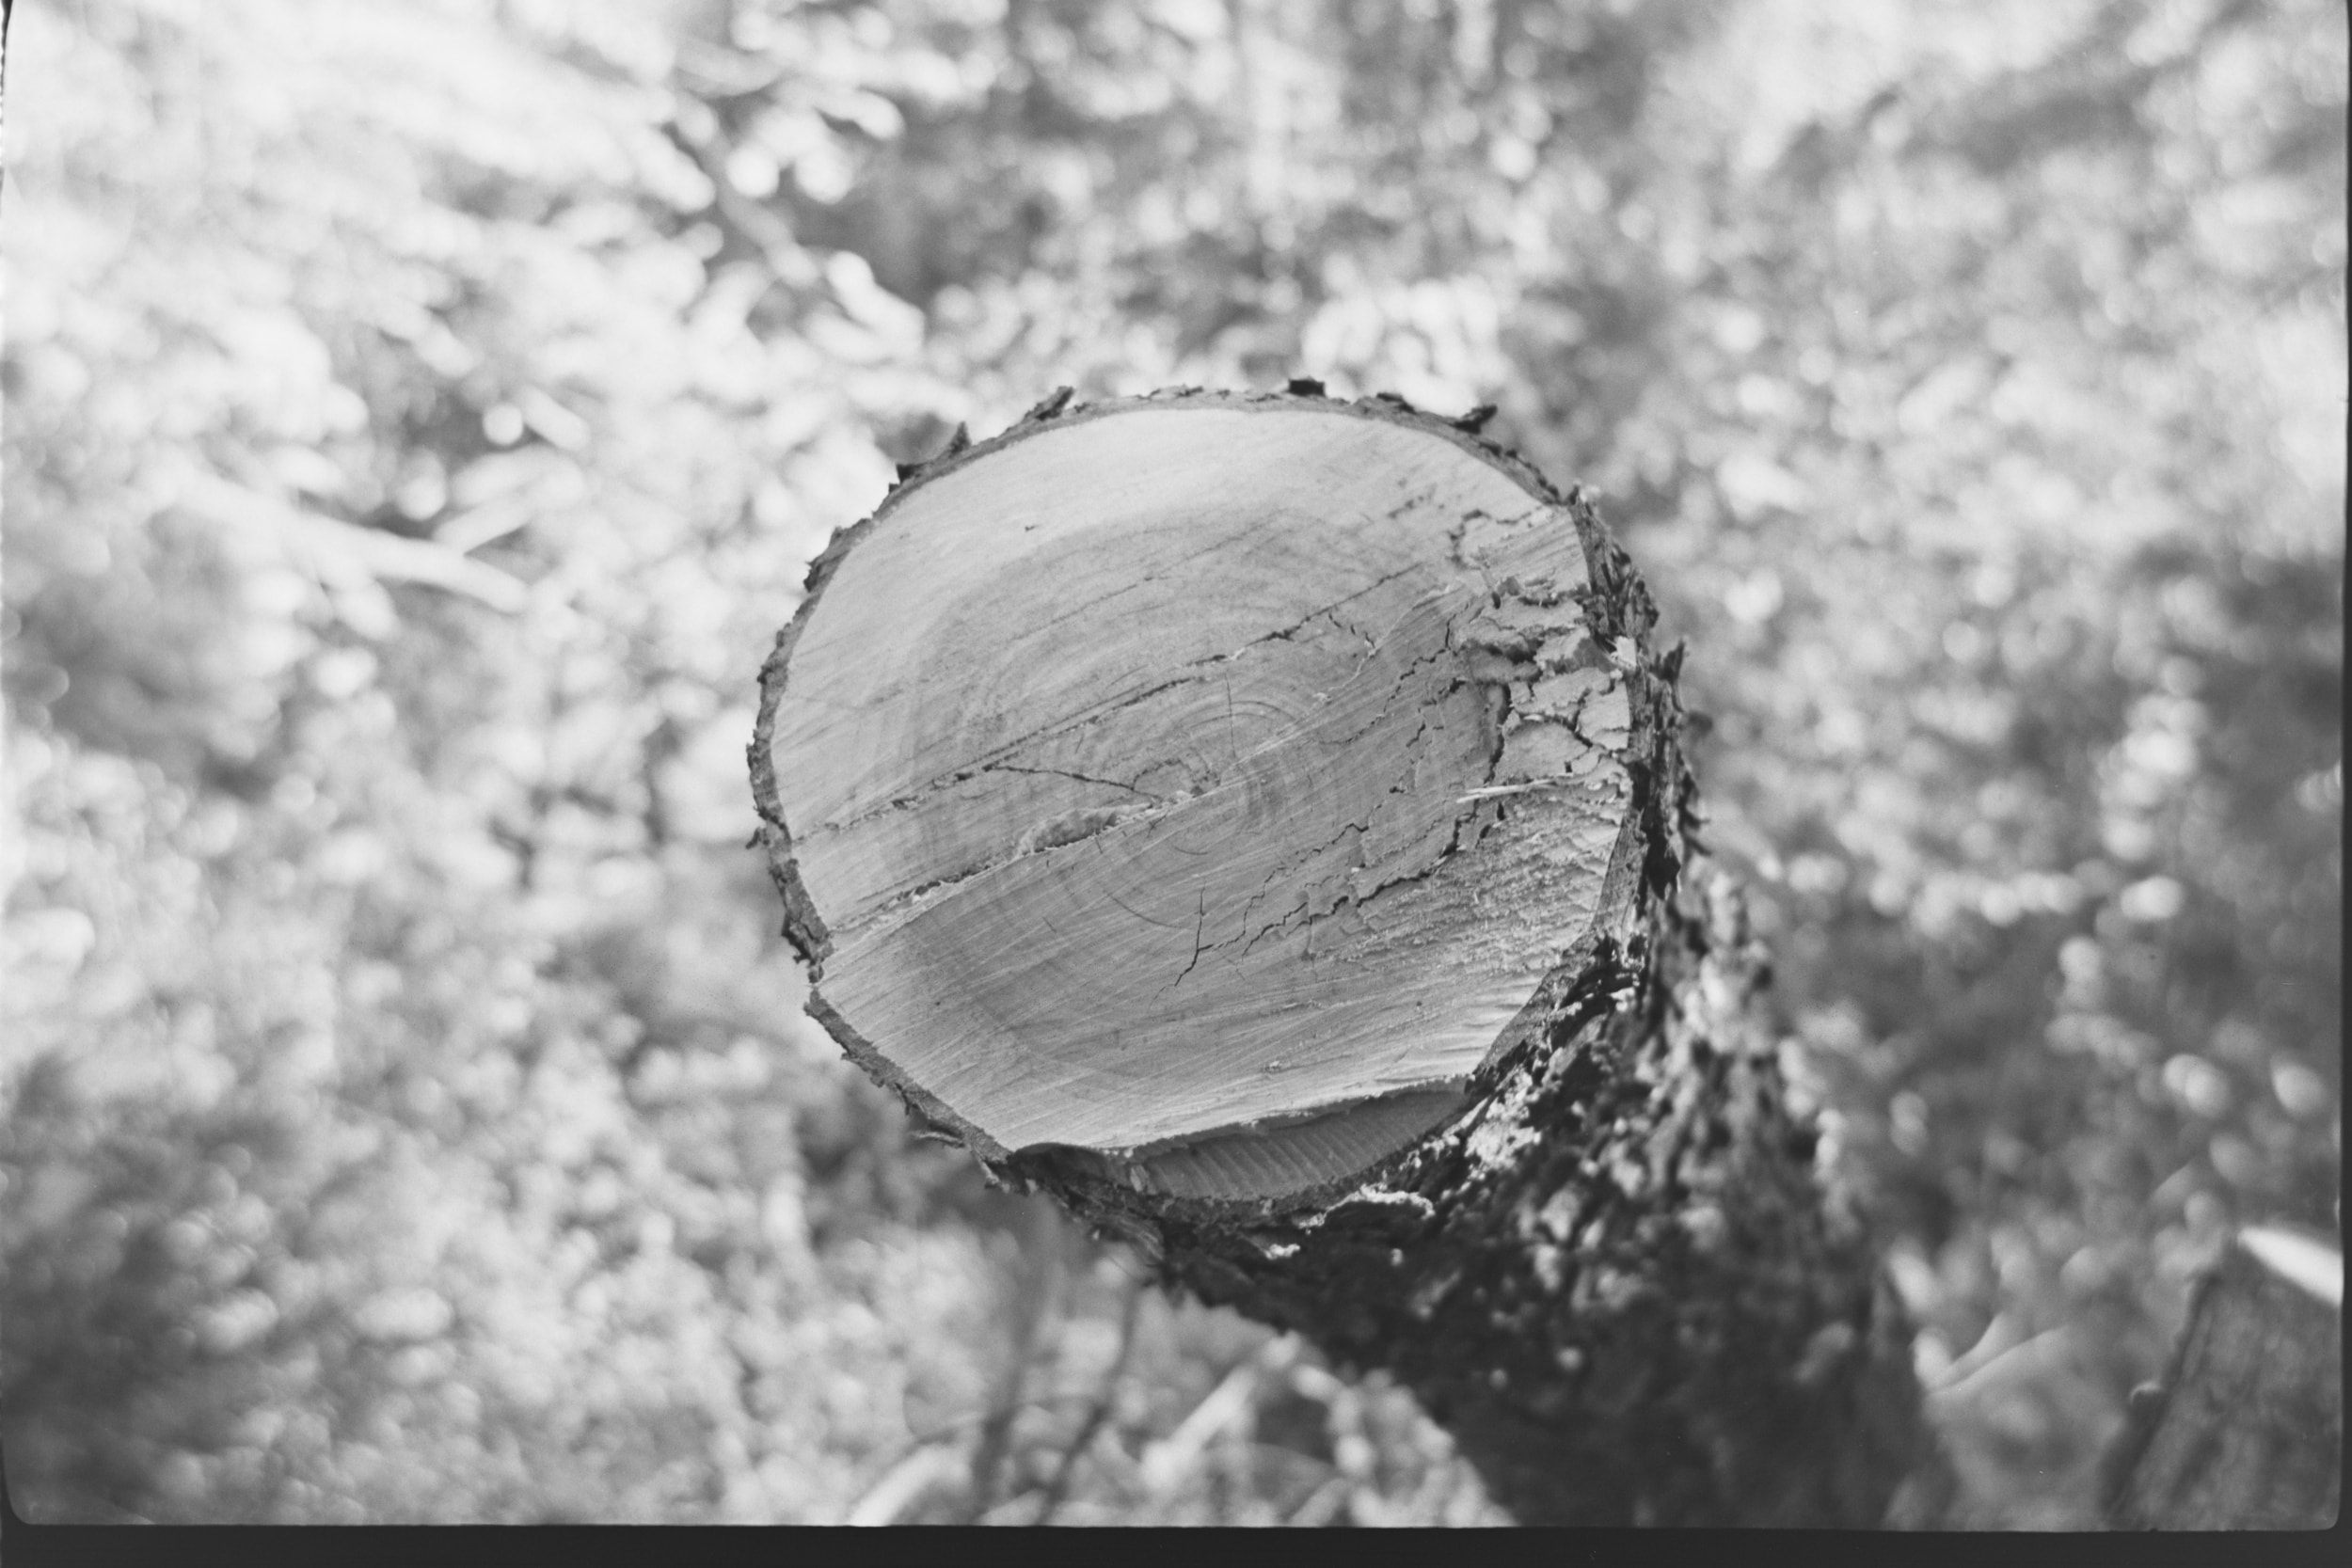
Here are some samples. Click to view the fullsize images. Note that the fullsize samples are essentially uncropped; I cropped only enough to remove black borders, even when I wanted to crop more to improve the composition.


The edges and corners are slightly less detailed and show a bit of vignetting, helping to emphasize subjects. This is especially true at wider aperture settings. However, even wide-open, the lens is almost flare-proof, and remains surprisingly sharp, even at close focus distances.


At wide apertures, and with the right distance between the camera, subject, and background, you can definitely see some swirly backgrounds, another classic triplet behavior. The swirl is on display in one of the rose images above too, but for those who like it and don’t feel it is offensive, the Pony can swirl much more prominently than that. On the other hand, if you like clear, detailed images without obvious character, just stop down the Pony’s lens to about f/8 or smaller, and the character neutralizes—it gets sharp enough for very nice landscapes.


I was surprised to find that the Pony 135 Model C’s lens doesn’t appear to cover the full 35mm frame size completely. I suspect this will differ for other model variants, but the Model C has a well-defined circle of sharpness, beyond which the corners of the image aren’t sharp. The blurry corners get less noticeable at f/16 and smaller apertures, but they never go away completely. Look back through the previous sample images; if you didn’t notice it before, do you see it now? In some images, it’s very obvious indeed.

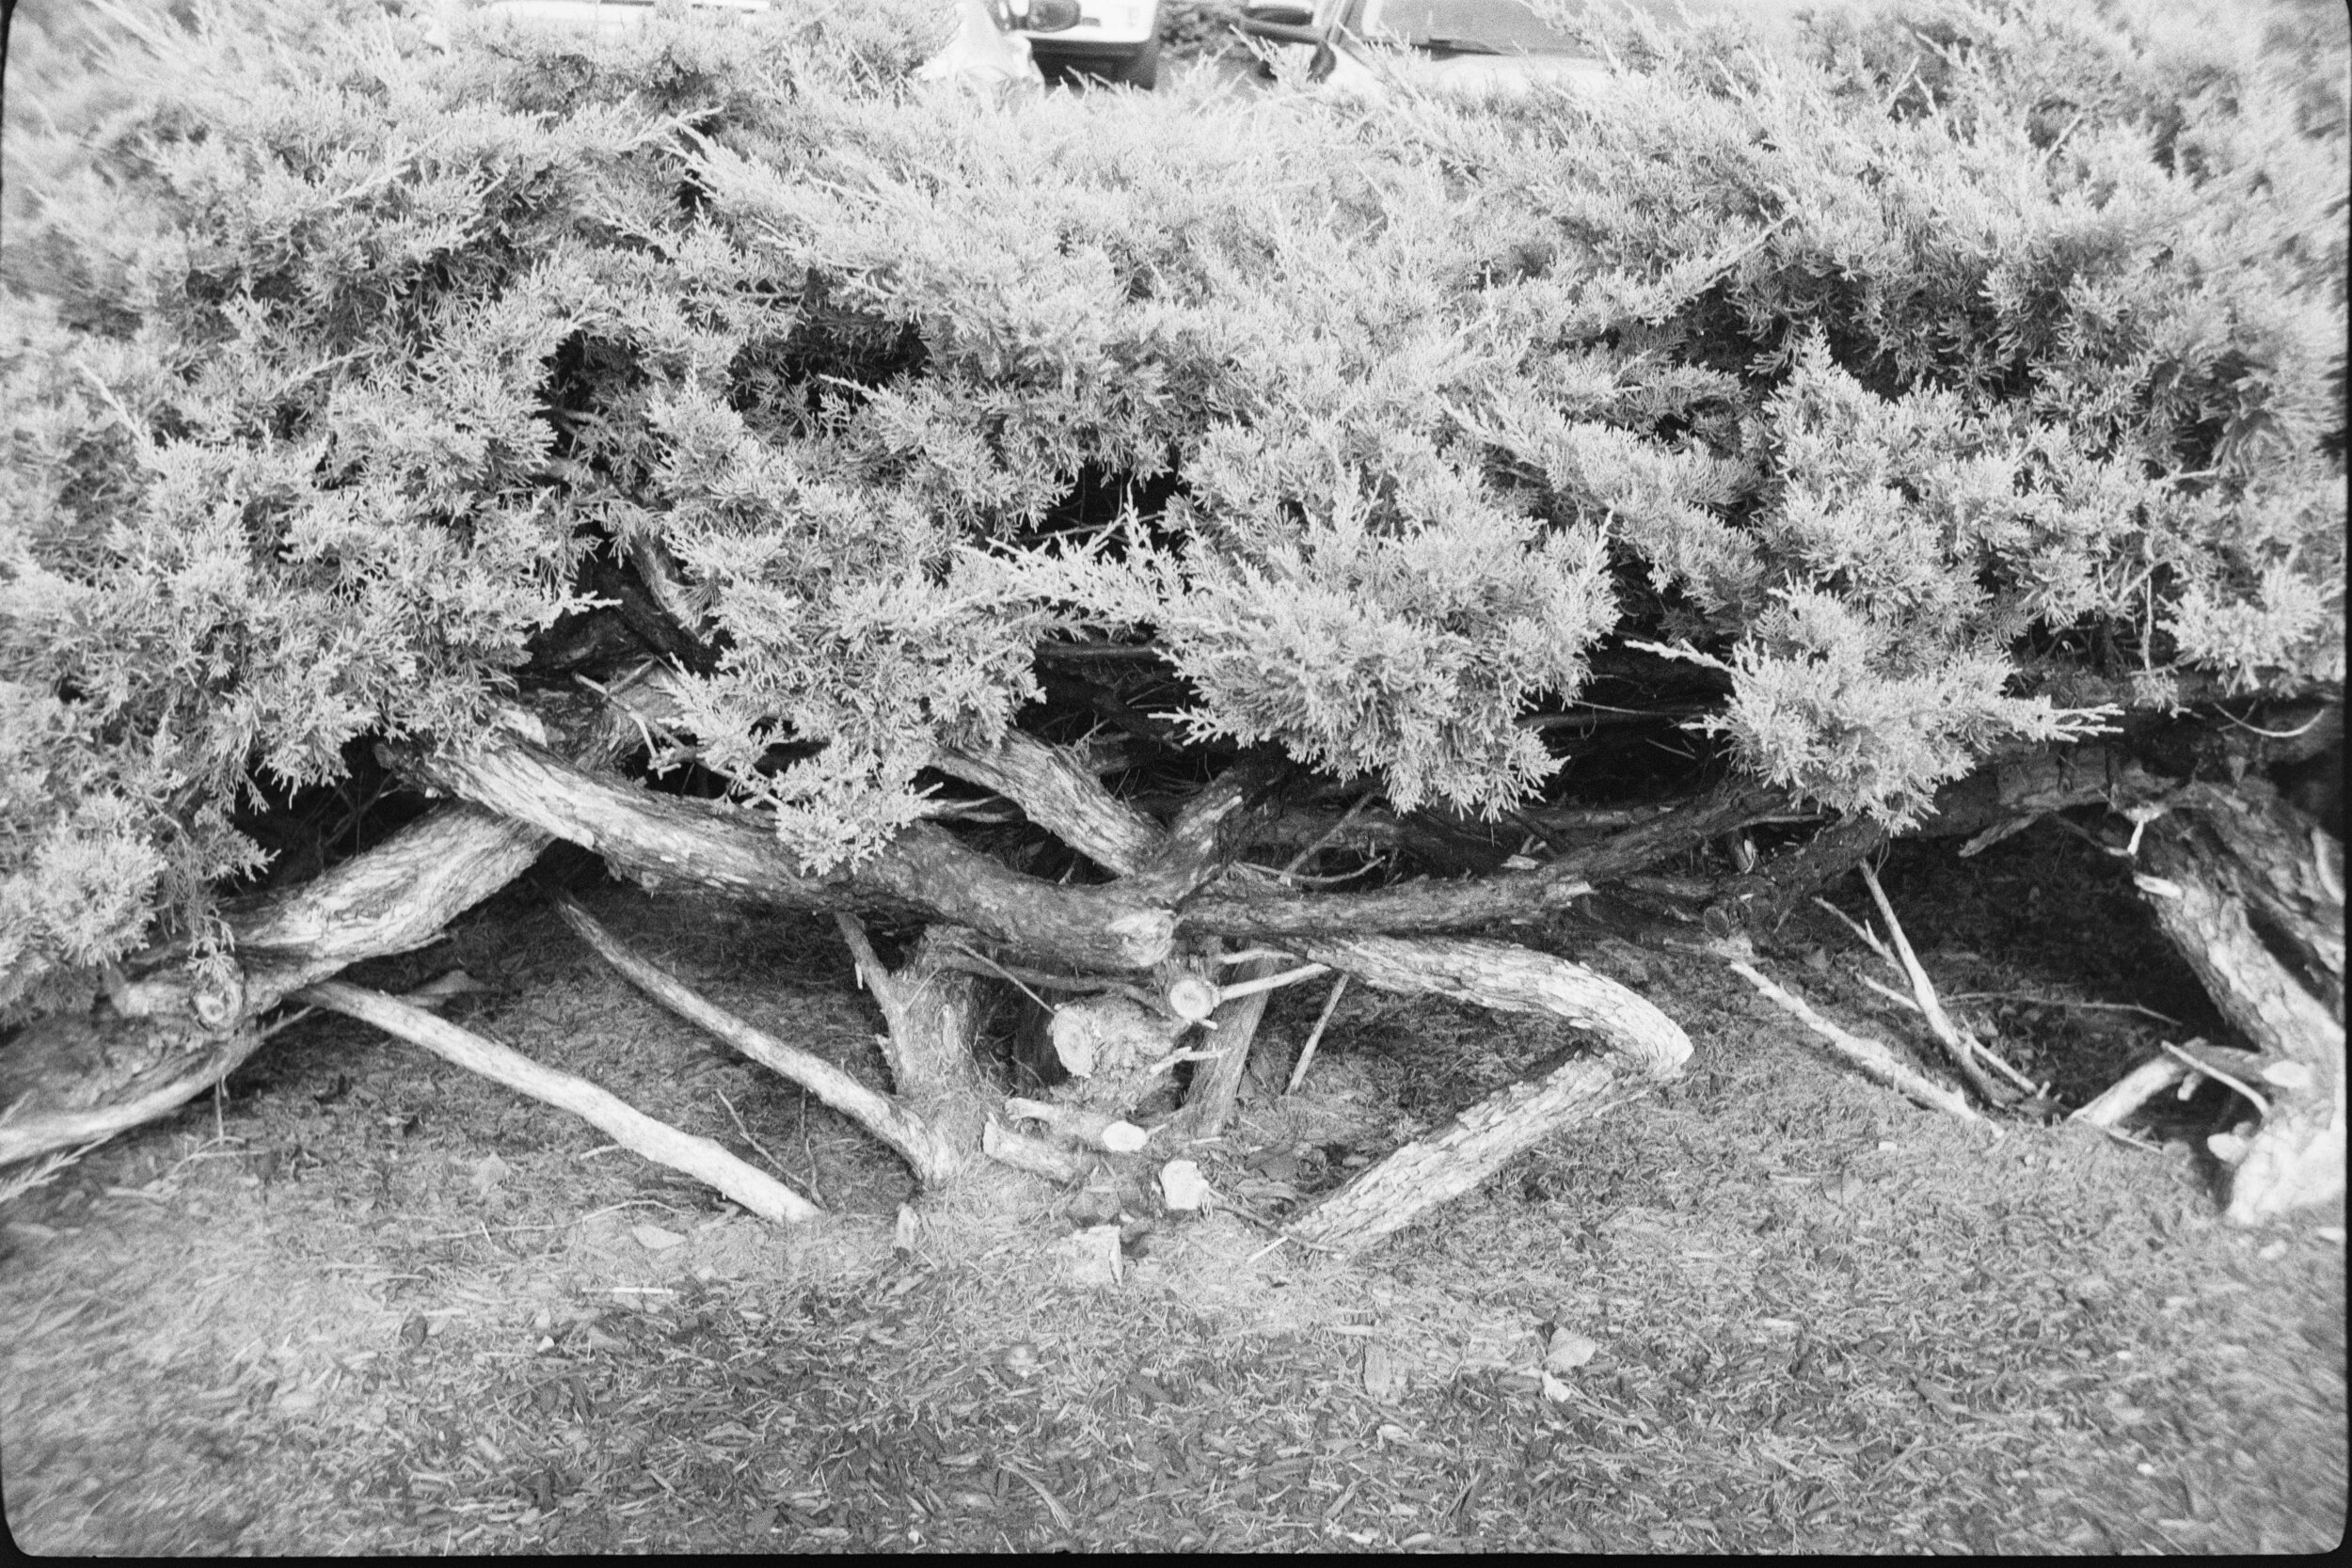

The blurry corners are a property of the Model C’s lens design, not just my copy. I have seen it on all of my Model C copies. I also inspected sample photos1 from other people’s Model C cameras, and found the same thing, although I noticed that most people tend to use the Pony at what appears to be f/11 or smaller apertures. Still, if you look closely, you’ll see it even at those small apertures.2 I don’t think this is a problem for most scenes; just something to be aware of. It usually is unobtrusive. Not only that, but you’ll find your images are wider than you think, and even slight cropping removes the blurry corners.
All things considered, the Kodak Pony 135 Model C has a really great lens with a beautiful rendering.
User Experience
Kodak made cameras to sell film. As such, they were good at designing reliable, attractive, easy-to-use cameras that did just what was needed. The Pony is an example of that design strategy at its best. Almost every task you need to do in order to make photos is as simple as possible with the Pony. There’s very little to know; most things are self-evident.
- Opening the back: there’s a clasp at the right side of the back, which also holds the neck strap a la a Holga. Press the button on it and slide it down; then the back just lifts off.
- Loading film: the Pony actually has a rudimentary quick-loading feature, and loading film is significantly simpler and easier than most cameras in its class. There is no need to try to fit the film leader into a slot or hook it over protrusions. Simply extend the leader across the sprocket and take-up spool, so that the tip of the film touches the take-up spool, and turn the advance knob. The spool will catch the film, carry it around, and a little guide spring will cause the end of the film to tuck itself in. Very easy to do. Close and latch the door, then advance past the first two frames. Turn the frame counter to the number of exposures; it counts down as you shoot.
- Advancing film: there’s an “advance release switch” just at the top of the back door. Slide it, release it, and turn the wind-on knob until it stops.
- Making a photo: set the shutter speed, aperture, and focus distance using the controls on the lens. Cock the shutter by pressing down the lever on the side of the lens/shutter assembly (it doesn’t self-cock as you advance). Release the shutter with the button on the top of the camera. The shutter is almost completely silent. There is no double-exposure prevention, so you can re-cock and re-release the shutter for multiple exposures. If you don’t want that, you must remember to advance after making a photo.
- Rewinding: slide the rewind release switch to the side (it’s at the top of the back door) and turn the rewind knob.
The Pony is actually a bit of an enigma, in that some features are a step above its class and some are more primitive than expected. The quick-loading feature is definitely unusual for its time and for a budget-oriented camera. I can’t think of another comparable camera from the time period that offers such easy film loading; only premium cameras from slightly later, like the Canonet QL17, come to mind.
But on the other hand, it also leaves some expected functions as exercises for the user. You must cock the shutter yourself, and remember to advance to the next frame after making a photo. Most cameras designed for ease-of-use by non-professionals would automatically cock the shutter when advancing, and refuse to advance again until released, thus preventing both double exposures and skipped frames. The Pony is super-basic in that regard, an odd incongruity compared to the extra effort they put into making film loading easy. I happen to adore this; I like having absolute control over all functions so I can make multiple exposures or do anything else I wish, without the camera trying to stop me. But for many people in the target audience when this camera was sold, it would probably result in unintentional double exposures and other disappointments.
I must admit that when I use a camera like the Pony Model C, without double-exposure or skipped-frame prevention, I experience a slight sense of nervous anxiety. Not really unpleasant, just an alertness, and a bit of self-doubt: did I forget to advance after the last frame? Have I just double-exposed and ruined both the last frame and this one? If I advance just to be sure, will I waste a frame by leaving it blank?
The Pony Model C is kind of gloriously basic, but that doesn’t mean it’s a toy. Since the Pony has the most important features like a tripod socket and a cable release socket, you could do just about anything you want with it. When I use cameras like the Pony, I find myself aware of a slowly growing sense of joy. By the time I finish a roll, I am usually very, very happy. I tend to make better photos when I’m in such a mood.
Strengths and Weaknesses
I think the Pony is mostly strengths, with just a few drawbacks, depending on your perspective.
- Simple, easy to use, handsome, and portable. Do I repeat myself? Very well, I repeat myself.
- Robust, and inexpensive if anything happens to it. I would take a Pony onto the beach without hesitation; there are many precious cameras I would never take onto the beach, ever.
- Great lens. I love triplets.
Most things about the Pony are kind of basic, like the viewfinder. Unremarkable; not special but good enough; you never think about them. Some cameras have so many obvious shortcomings that a review like this will point out how irritating they are. The Pony has just a few things:
- Rewinding is a bit of a chore. You must hold the release lever with one hand to free the film, and I mean hold it the whole time you’re rewinding. And the rewind is a knob, not a flip-out lever crank, so it’s slow and tedious to turn. That said, rewinding is infrequent compared to other things, so it doesn’t dominate the user experience.
- It doesn’t have an easy way to use modern threaded filters on the lens. The Model C’s manual, of which I have an original paper copy, claims that the Model C takes 1⅛” slip-on Series V adapter rings, but that’s just not true. I know because I have that exact adapter, Kodak-branded no less, and there’s just nothing for it to slip onto. And while you can hold a filter in front of the lens with your fingers and I’ve done it, it’s surprisingly harder to do with the Pony than I expected. I’ve done that with lots of other cameras and didn’t find it tricky, but I found myself fumbling with the Pony, worrying that I was shaking the camera or getting my fingers into the picture.
- The viewfinder seems like it is unchanged from the 51mm lens on earlier versions of the Pony, so it shows much less than the lens sees. I was surprised at how much wider the view in the photos was than what I thought I was framing in the viewfinder.
Special Abilities, Caveats, and Notes
Compared to the mainstream of cameras through time, the Kodak Pony 135 Model C might be notable for:
- Unusually easy film loading
- Easy double exposures
And the caveats to note:
- The viewfinder only shows about 75-80% of the actual picture.
- Those interestingly blurry far corners in the frame.
- The top shutter speed of 1/300th is pretty dubious. My CLA’d copies only reach between 1/180th and 1/220th. I suspect that the Model C’s “Flash 300” and the Pony IV’s “Flash 250” shutters are actually the same, but the latter is more honestly labeled. I’ll update this when I disassemble a Pony IV and find out.
Other Cameras That Come to Mind
Oddly, the Pony reminds me a lot of the Argus C3 “Brick” rangefinder camera. Humor me on this… I’ll explain.
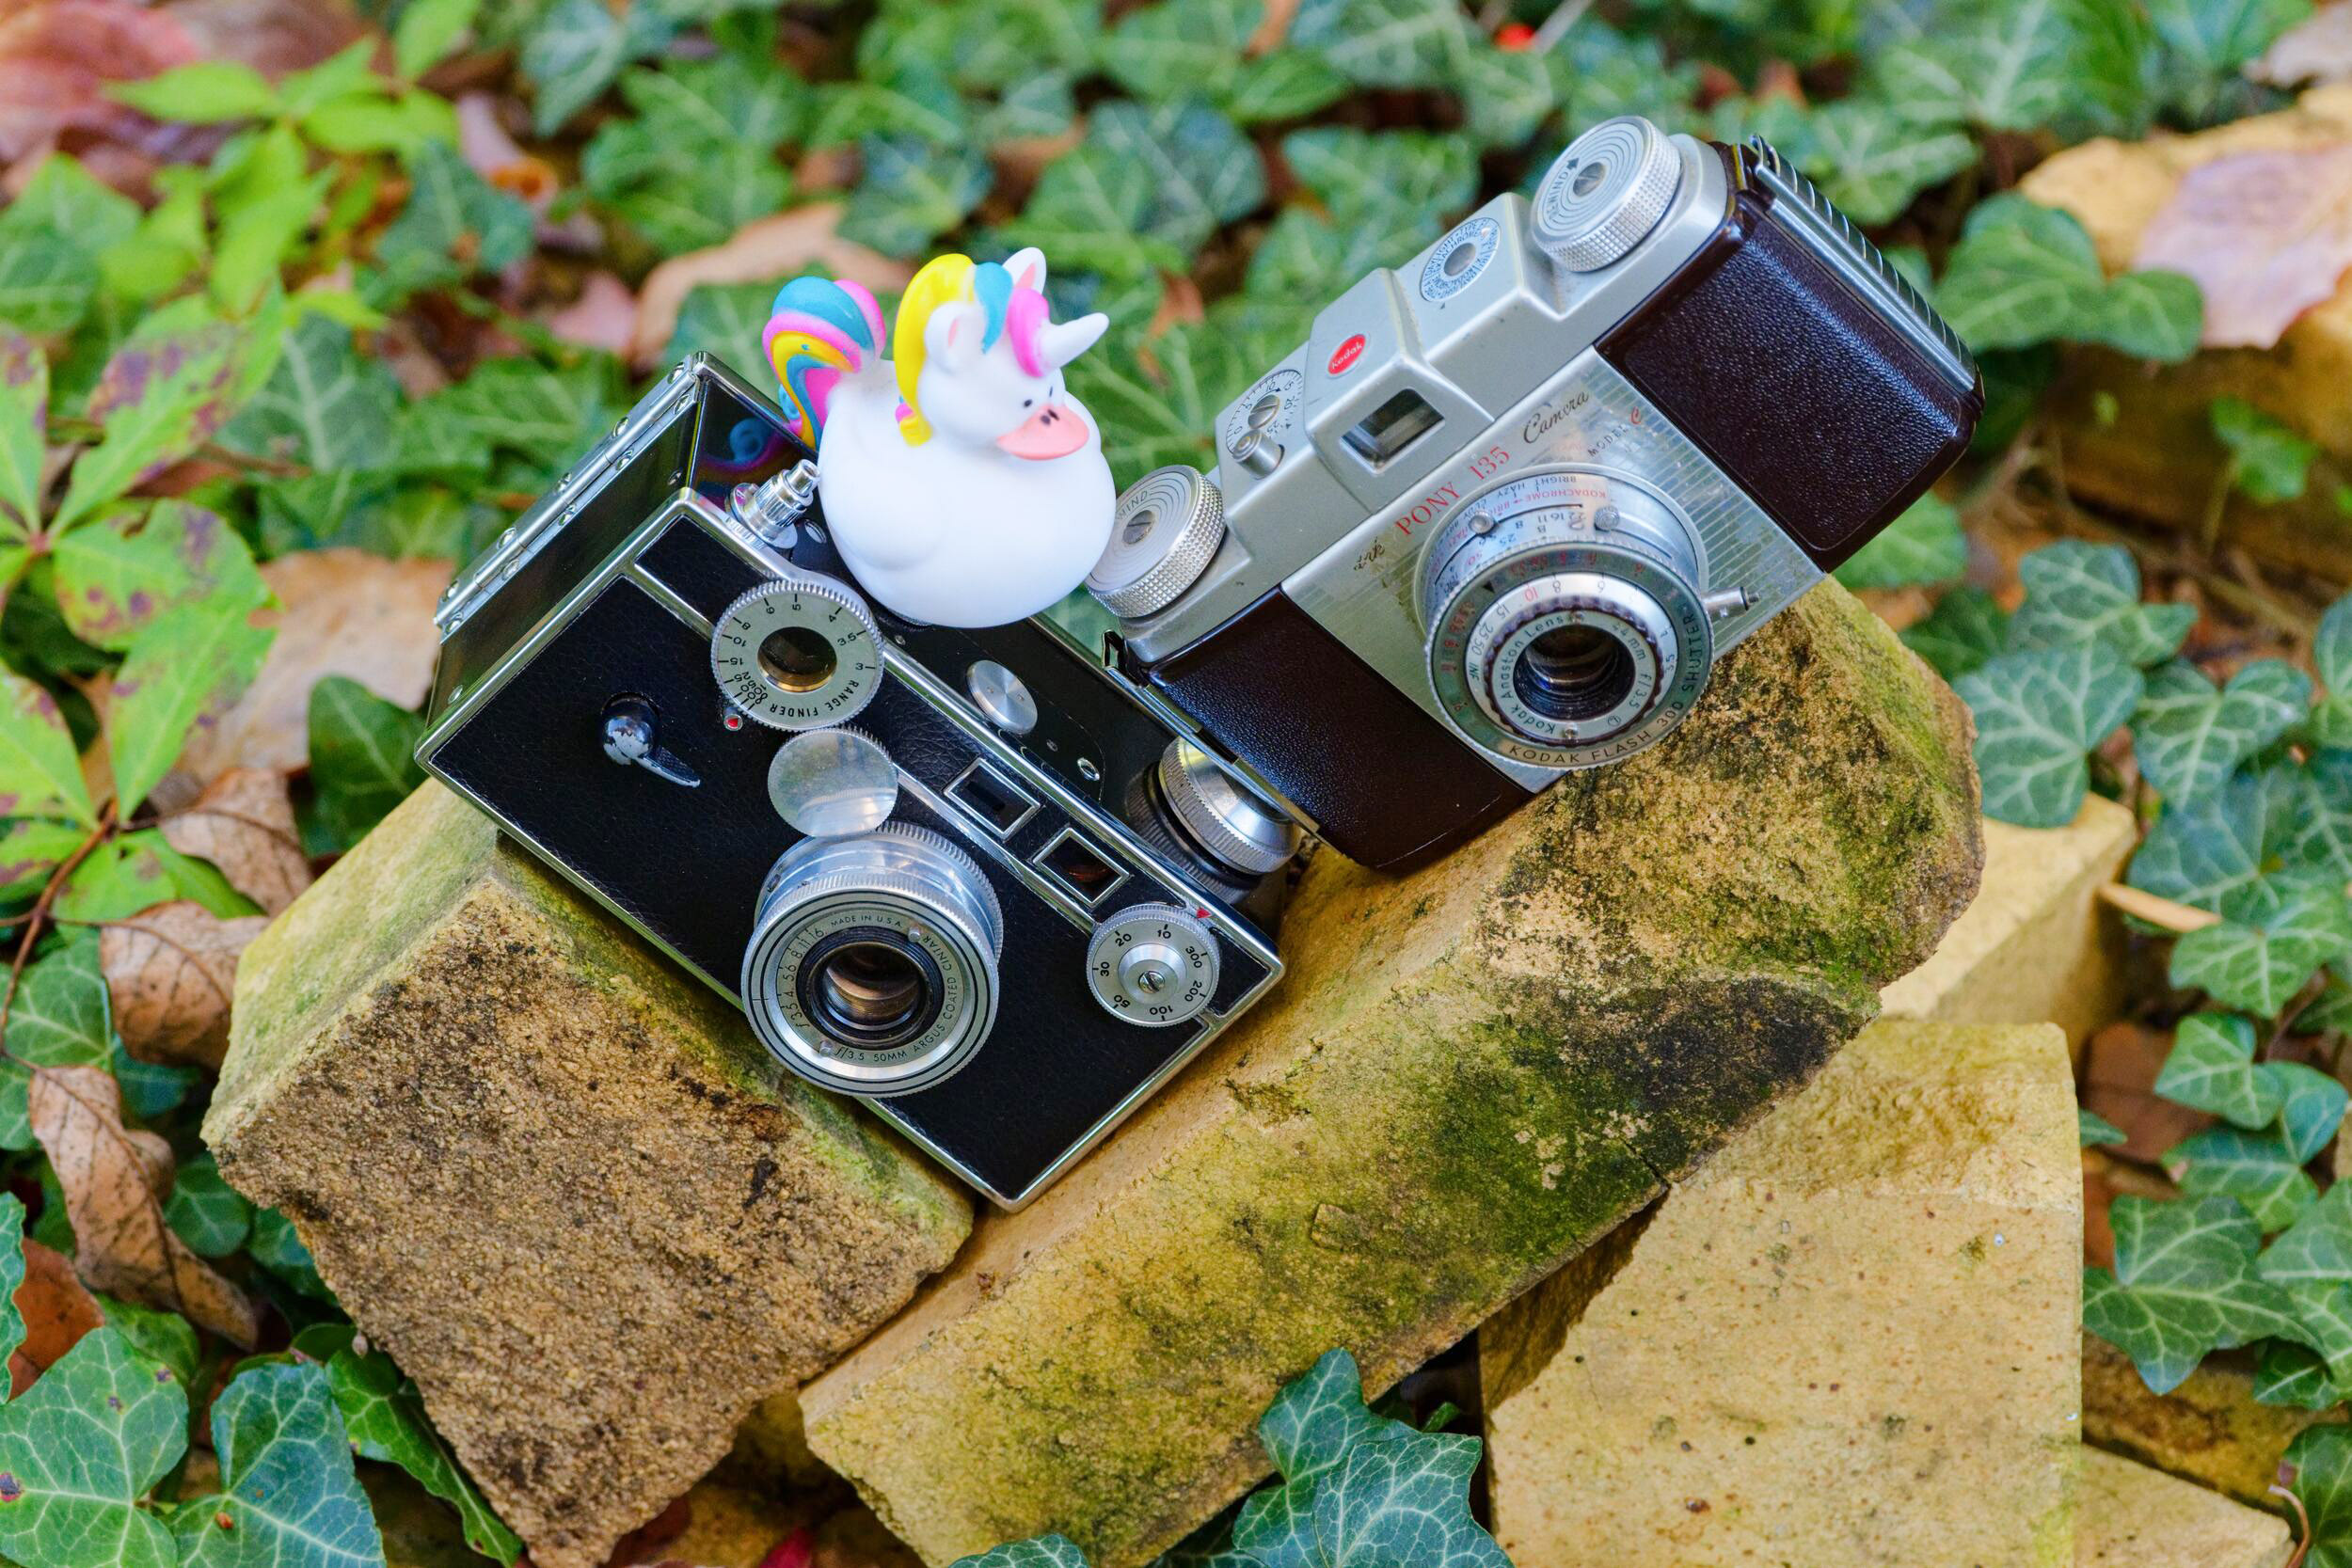
Although on the surface they’re very different cameras, many of the specifications and operations are almost directly parallel between the Kodak Pony 135 Model C and the Argus C3. The Brick has largely similar shutter speeds, and although it has one additional slow speed, it lacks B, which is a significant disadvantage for many usage scenarios. The Brick also must be cocked manually, and both cameras have shutter cocking levers that you can foul with your fingers while making a photo, which will stop the shutter from running. They have similar f/3.5 triplet lenses, albeit the Brick’s has a bit longer 50mm focal length like the earlier Pony variants. They have a similar way of advancing the film: you must release a little latch to wind on to the next frame. They both are made of Bakelite. And so on, and so on. Actually, there’s pretty good reason to believe that Kodak was spurred to make the Pony out of a desire to compete with Argus’s success—and that it took a few tries, and still they never quite caught up!
Where the cameras differ are the ergonomics, styling, and portability. The Brick is literally a brick-sized squared-off… uh… brick. It’s a brick. It’s big,3 heavy, and sharp-edged. It has a lot of foibles and a very loud shutter. Like the Pony, it’s delightfully meditative to use, but in terms of specifications and capabilities, the Pony is essentially an equal or better camera but sleeker, quieter, more beautiful, more comfortable, more portable, and easier and less quirky to use.
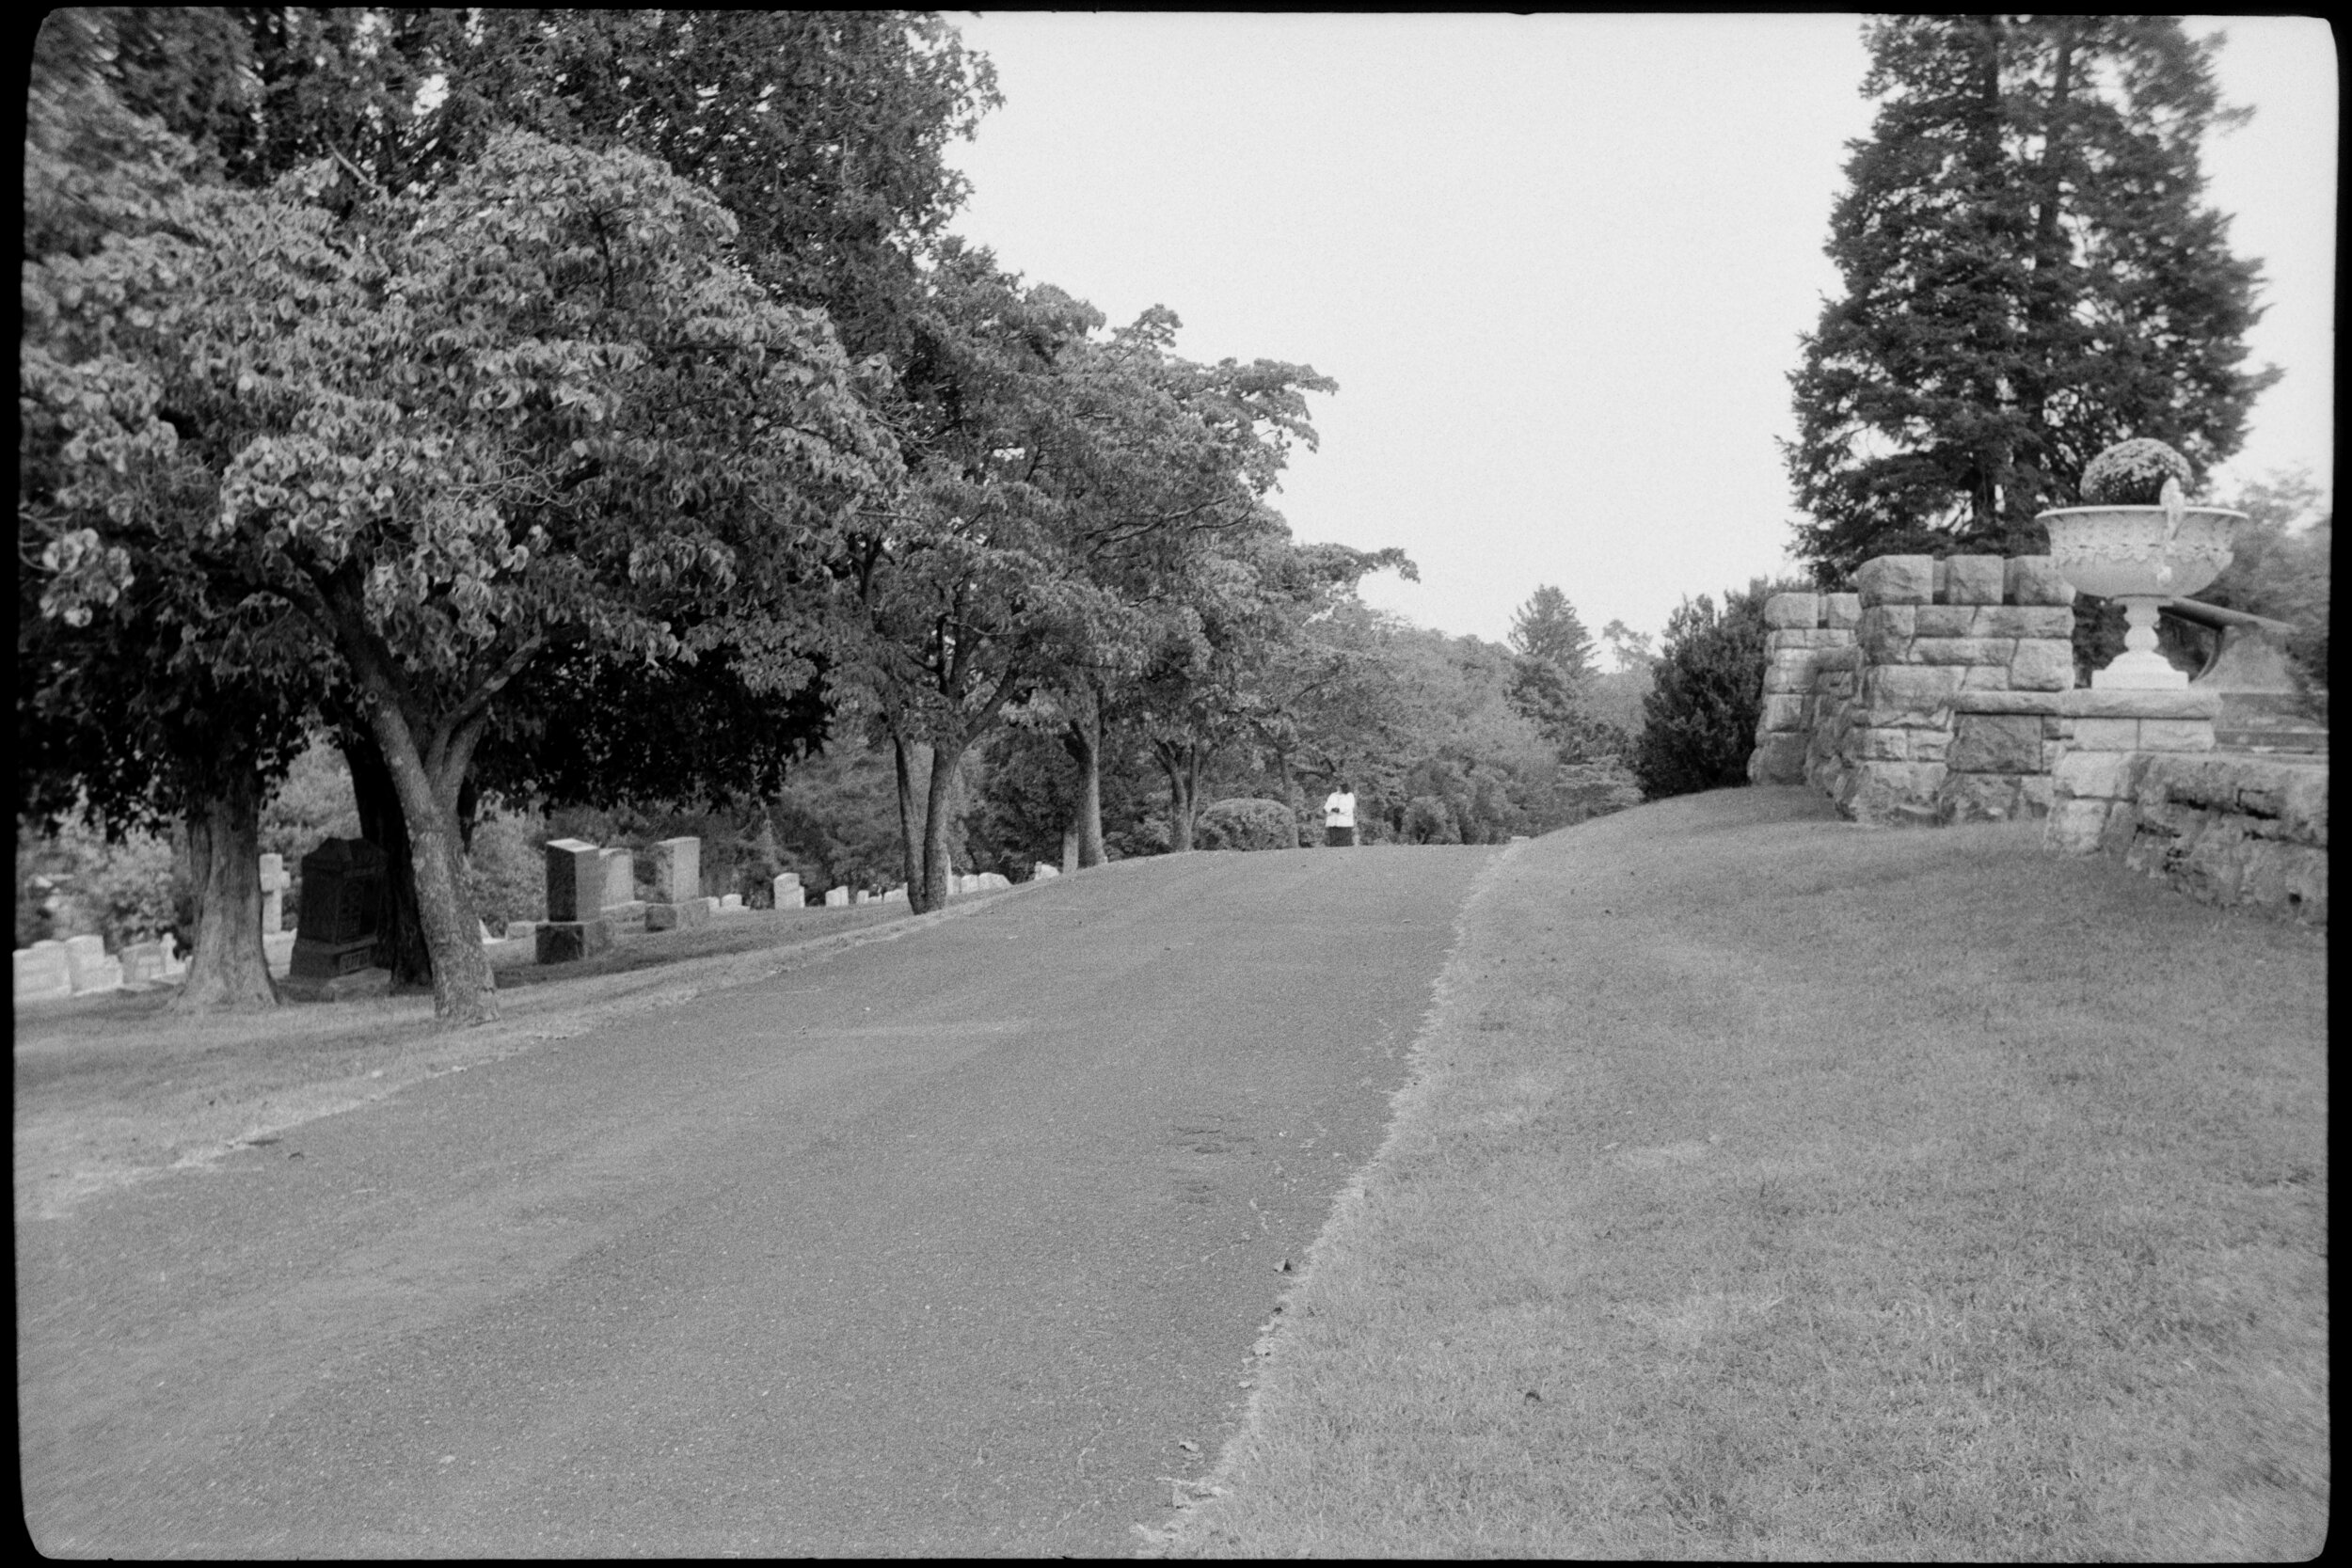
To remind myself of what the Brick is like to use, I took both cameras out for a walk, and every time I spotted a scene I wanted to photograph, I used both cameras to do so. This confirmed my memory of the Brick. Although they have a lot of the same features and specifications, in literally every case the Pony’s is much better designed and implemented, especially in terms of ergonomics. It’s just a superior camera in actual use. The Brick’s only advantage is its coupled rangefinder; the Pony must be focused by estimating distances. The Brick has many shortcomings, such as lacking strap lugs. However, it must be said that at the end of my walk, I was equally enamored with both of them. Nobody said I was a rational reviewer!
Beyond that unlikely comparison to the Argus C3, there are a few obvious comparables to the Kodak Pony. The Signet series, for one; that was Kodak’s own slightly-upmarket series of cameras, for those who wanted a bit more capability, e.g. with coupled rangefinders and more premium lenses. Perhaps the Bolsey B2. Most of the cameras that I think about when I’m holding a Pony are significantly more esoteric and less… less normal, I guess. Some of the Samoca 35 cameras come to mind. Again, those are lovely to look at, joyful to use, but have significantly higher mental friction. The Pony is just obvious to use.
Perhaps the more conventionally “normal” comparable cameras would be some of the midrange German ones from about the same time period, such as some models of the Agfa Optima, Agfa Silette, Zeiss-Ikon Contina, and the like.
One thing to consider about the Pony is that although it now seems like its design is conventional and obvious, that’s only as seen through the benefit of hindsight. If you look around at other cameras from the 1950s and 1960s, what would later emerge as the standard way to do things was far from a settled debate. You can find all sorts of cameras with vastly different designs, functionality, and control layouts. Looking for “normal, obvious to use” cameras with similar specifications from a similar time period is a biased approach. Similarly, considering other cameras to be unconventional or quirky is a biased mindset (although I did just that when describing the Argus C3 above).
Hacks and Modifications
The Kodak Pony 135 Model C is pretty great as-is. There is one trivial modification that I think improves it significantly: blacken the interior walls of the viewfinder. This cuts out a lot of internal reflections and flare, and makes the view much more vivid. Most of the Pony viewfinders need to be cleaned, and it’s trivial to paint some matte black paint or nail polish on the bottom and sides while you’re doing it. It doesn’t have to be neatly or even completely painted; even a hasty, sloppy job will be 99% better.
Another nice modification would be to add a standard threaded filter ring to the lens. I haven’t yet done this, but I think I’ll take a filter adapter “step ring” and grind off its rear, then glue or stick it onto the Pony’s lens to add a filter thread.
Finally, I think the Pony IV has the same top cover as the Pony 135 Model C, but it adds an accessory shoe in place of the film reminder dial. I haven’t yet confirmed this, but I think I can upgrade a Model C with the top cover from a Pony IV to gain that accessory shoe, which would be handy to hold an accessory rangefinder, meter, or a flash.
Serviceability and Notes
The Pony has very few parts and very little to go wrong. If you’re interested in fixing one yourself, it’s easy to do, even if you have few tools and little experience. It’s a good camera for a complete beginner to work on.
Almost all Kodak Pony cameras have filthy viewfinders and slow or stuck shutters. Both problems are easy to fix, at least to the point of making the camera nicely usable. All that’s usually necessary to get the shutter firing consistently again is to clean the escapement, which is easy to reach without deep disassembly. (Restoring faster top speeds likely requires cleaning deeper components, but you may consider this optional).
The entire camera and all of the potentially troublesome or stuck parts can be disassembled with a couple of small to medium slotted and Phillips screwdrivers. (Later copies lack screws atop the advance/rewind knobs and are more difficult to disassemble).
- Two screws on the wind knobs release them. Beneath them two screws release the top cover, giving access to clean the finder and inspect the advance mechanisms. Be sure to note when removing the cover how the frame counter is engaged with an eccentric that drives a pusher lever.
- Two screws on the focus ring hold a few rings and spacer in a sandwich clamped forward/aft around the focusing element. Remove the screws and you can unscrew the focusing element. If you want to keep things super simple, mark the lens’s 12 o’clock position when focused to infinity, and count how many turns till it comes free so you can reinstall it the same way. Otherwise, the lens is easy to collimate to infinity using standard methods.
- Behind the focusing element is the shutter cover, held by two screws. These also release the speed cam and selector grip. With this removed, you have easy access to the (very simple) shutter internals.
- Should deeper disassembly be required, it’s essentially as obvious as the above, but that should suffice for most typical issues you’d want to address.
Beyond these very basic notes, you can find some photos of disassembly and notes at https://pheugo.com/cameras/index.php?page=pony I don’t do everything exactly as illustrated on that page myself, but it’s a great starting point for getting a Pony working and usable.
References
Quotations from references are not literal quotes: they are edited and condensed, sometimes to the point of paraphrasing.
- https://mikeeckman.com/2022/05/kodak-pony-135-model-c-1955/ Mike actually reviews the 828, Model B, and Model C all in one. If you would like a much deeper dive on the Pony’s history, this is a good resource. “Optically, these images are wonderful and speak to how good Eastman Kodak was at making simple cameras that made good photos. I had to keep checking to confirm this wasn’t a higher spec lens as this Anaston triplet punches way above it’s weight. The Pony’s viewfinder is very easy to use, even while wearing glasses.”
- https://blog.jimgrey.net/2013/11/18/kodak-pony-135-model-c/ generally praises, but “the lens delivered good color and sharpness, but definition could be better. My only complaint with the Pony cameras is that their viewfinders show so much less than the lens sees.”
- http://www.alexluyckx.com/blog/2017/06/06/ccr-review-64-kodak-pony-135-model-c/ “mid-century charm, simple, clean, and symmetrical, good build quality that can handle a fair amount of damage. While shooting is a smooth operation, the rewind is difficult. A few frames had no more than a razor’s edge between them, making cutting and scanning a bit of an issue. Don’t expect stellar image quality, but the Ponies have optical qualities that many photographers look for in lenses and often pay a premium.”
- https://filmphotographyproject.com/kodak-pony-1950s-little-work-horse/ “when you’ve estimated the distance accurately the Pony’s Anastar lens is capable of sharp images. It’s viewfinder, however, is another story since it’s quite small, and those of us with eyeglasses may find it a chore to see to the edges of the frame as we struggle to peer at our subject.”
- http://historiccamera.com/cgi-bin/librarium2/pm.cgi?action=app_display&app=datasheet&app_id=1139
- https://camera-wiki.org/wiki/Kodak_Pony_828/135
- https://www.butkus.org/chinon/kodak/kodak_pony/kodak_pony.htm
https://www.flickr.com/photos/mobilene/10572799473/ is an example of another user’s Model C that shows blurry edges. ↩︎
https://www.flickr.com/photos/mobilene/10572579614/ is another example with blurry corners, despite seemingly being stopped down pretty far. ↩︎
The Argus C3 Brick is pretty big, although when I got out mine to compare to the Pony, I realized it’s smaller than I’d remembered it. I guess a camera like that has a way of growing in your memory. ↩︎